1. Data Import App
Xplain Data’s import import tool is a web application which helps you to import data from different data sources into Xplain XTables or XAttributes. How XTables or XAttributes are defined is coded in a small JSON file, one for each XTable or XAttribute. Instead of using the import UI, you may as well write the configuration file with a plain text editor - in one of the following sections you find the documentation of the JSON schema.
Once defined, you can then import data from the source database into an XTable or an XAttribute by hitting the “Generate” button in the UI. You may, however, also run the import process from command line, with the configuration file as a parameter. This allows you to put the divers import and update tasks into a script or a task management tool.
General process
The general process of building an ObjectAnalytics model is as follows:
For each entity (root object or sub-object) in the object tree you pull corresponding data from the source database and load it into an XTable (the format in which data is stored in the ObjectAnalytics hierarchy).
Then you hook those XTables together to form an object hierarchy. You do this by writing a startup configuration file, which defines the starting point for any object-oriented analysis.
You might ask: Why do I need to replicate tables in the source database into XTables in the ObjectAnalytics environment? Basically, XTables are not just “plain tables”. XTables organize data and meta data in a very specific way such that an object-oriented view to those data can be assembled very quickly from that.
In the following, you learn how to pull data from a database and build an XTable. There is a little UI available to do that, but instead of using the UI you may as well write just a few lines of JSON configuration file (see the corresponding section). The section “Defining XObject Views” then details how to hook XTables together by writing a startup configuration file. There is no UI for that second step available yet - it might come soon.
Preparation
Start the Xplain import tool as web application either via command line in console or from docker image. Make sure the environment variable
xplainpathis set correctly. (To obtain the import.jar file for command line or the docker image, please contact the Xplain Data team.)
Example via Docker image
docker run -it -v <local xplainpath>:/xdata --rm -p 8080-8081:8080-8081 www.xplain-data.de:5000/xplain_jar:master
Example command line:
java -jar import.jar
Open the URL http://localhost:8081/generate/index.html in your browser, you will see the following screen.
The screen layout is divided into 3 areas:
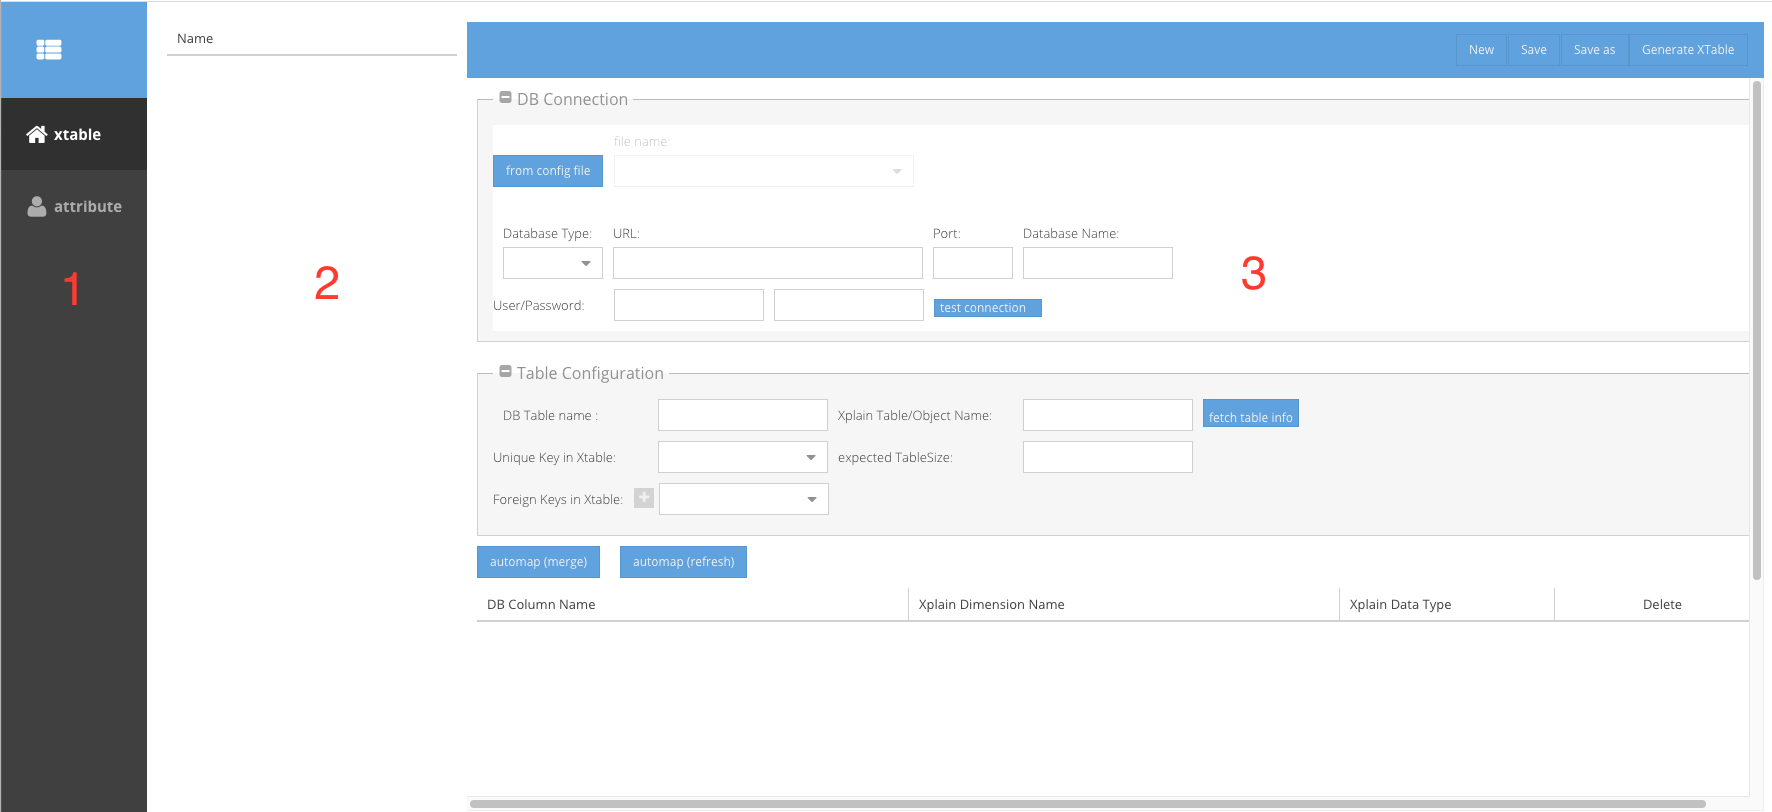
the choice between generation of XTables (*.xtable) and XAttributes (*.xattribute),
a list of existing *.xtable configuration files or *.xattribute configuration files, and
the configuration details of the selected configuration file.
Generation of XTables
Select Tab “xtable” on the left panel
Either mark one existing xtable configuration file in the list panel or click the Button “New” on top right
In detail panel you will see following elements: DB Connection: in this group you can setup the connection to the data source.
Toggle Button “from config file”: by toggling this button you can chose if you want to define the connection to your data source from a separate configuration file or from the screen input fields. If “from config file” is selected, you can select the connection file name in the “file name” drop-down box. The connection configuration files must be located in <xplainpath>/config directory and have the file extension “.xdbconnection” . The content of a .xdbconnection file must be a JSON.
Connection to Data Source
An example for connection to MySQL-Database looks like following
{
  "databaseType" : "MYSQL",
  "url" : "localhost",
  "portNumber" : 3306,
  "user" : "my_user",
  "password" : "my_password",
  "databaseName" : "te´t_db"
}
For connection to CSV
{
  "databaseType" : "CSV",
  "databaseName" : "c:\\myTemp",
  "csvConfiguration" : {
  "columnTypes" : "int,string,date",
  "quotechar" : "\"",
  "separator" : ";",
  "timestampFormat" : "dd-MM_yyyy HH:mm"
 }
You can also define the connection with input fields:
Database Type
Drop-down menu “Database Type” : you can choose the Database type of your data source. By different database type different additional input fields will appear.
relational DB = [MYSQL, MSACCESS, ORACLE, SAPHANA, POSTGRESQL]
DB Type |
Fields |
Mandatory |
Remark |
|---|---|---|---|
relational DB |
URL |
x |
If import tool is started from docker, the URL should be the IP address of host instead of host name |
PORT |
x |
3304 by MYSQL by default |
|
Database Name |
x |
||
MSSQLServer |
URL |
x |
|
Port |
x |
||
Database Name |
x |
||
Integrated Security| |
True, False |
||
Auth Scheme |
Native, NTLM, Kerberos| |
||
Domain |
Domain of Workgroup |
||
Excel |
Database Name |
x |
Name of Excel File, located in <xplainpath>/data |
CSV |
Directory of csv |
The absolute path of csv file, the default directory is <xplainpath>/data |
|
Quotechar |
If any csv item string contains separator char, you could wrap this string with Quotechar, e.g. the separator is “,” a item could be quoted like “this,item”, default is “ |
||
Separator |
The separator of CSV |
||
Timestamp format |
If you want to import a csv as timestamp type, you could tell importer the timestamp format of the string in that column |
||
Time format |
If you want to import a csv column as time, you can tell the importer the time format of the string in that column |
||
Date format |
If you want to import a csv column as date, you can tell the importer the date format of the string in that column |
||
Column types (comma separated)| |
x |
You have to specify the column types of CSV, the number of types must correspond the number of columns, separated by commas. Available types are int, double, string, date, timestamp, time |
By Excel and CSV you don’t need to provide user and password
By DB types the input fields for user/ password and a button “test connection” are visible.
By clicking “test connection” you can verify if you could connect to DB successfully with the current connection configuration.
Table configuration
The input fields should be filled with the following parameter:
“DB Table name”: the name of the database table in case of a relational data base (the filename in case of CSV imports; the name of the tab in case of Excel imports).
“Xplain Table/Object name”: the name of the target XTable to be generated
“fetch table info”: by clicking on this button you can retrieve the meta data of the source data base table. The dropdown menu “Unique Key in Xtable” and “Foreign Keys in Xtable” will be populated with column names of database table.
“Unique Key in Xtable”: the primary key. It is mandatory if the xtable builds the root object.
“Expected Table size”: the number of lines in the data base table, it is optional. It is used to calculate the optimal package size of the target xtable.
“Foreign Keys in Xtable”: if the object of this xtable should be appended as the child of a parent object, the primariy key of the parent object should be the foreign key, an Xtable could have multiple freign keys. Click “+” button you could add further foreign keys.
“automap (merge)”: By clicking on this button, a list of dimensions will be created based on the table columns. The dimension name and type are automatically mapped. If some dimensions are already manually modified or deleted before, the modifications will remain.
“automap (refresh)”: By clicking on this button, a list of dimensions will be created based on the table columns. All existing modifications regarding name, type and deletion will be lost.
If you double click on the cell in columns “Xplain Dimension Name” or “Xplain Data Type”, you can change the value.
Click the button “Save” or “Save As” to save the current configuration with a given name. The saved xplain table configuration will appear in the list in the middle panel.
By clicking the button “Generate Xtable” you will generate the Xtable in the directory <xplainpath>/data.
Generation of XAttributes
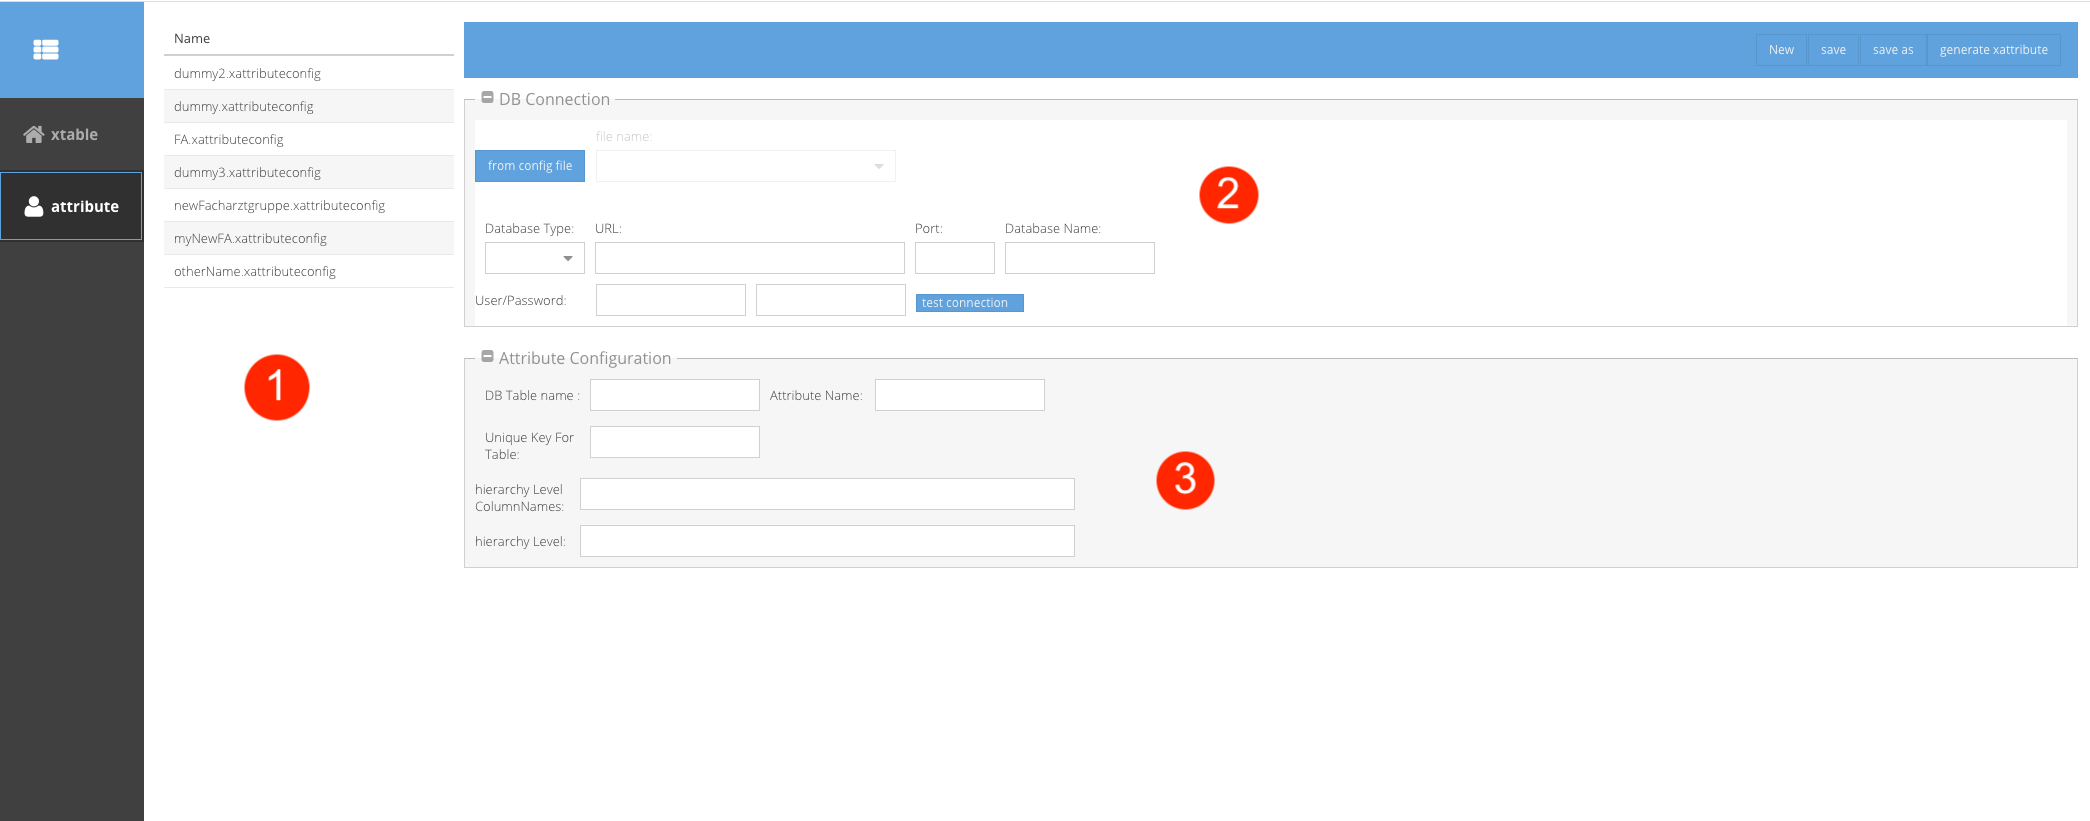
The middle panel list all existing xattribute configuration files in <xplainpath>/config
The DB connection setting in XAttribute generation is exactly the same like XTable Generation.
Attribute Configuration: the Attribute specific details
DB Table name: the table name in relational DB, or Excel tab name if it is imported from a Excel file.
Attribute Name: the name of xattribute
Unique Key For Table: in the data base table or Excel there must be a column with unique values.
Hierarchy Level Column Names: you can enter a list of column names of the source data table, separated by “;”, to generate the hierarchy of attributes.
The highest level should be at the beginning of the list , the lowest level at the end. The lowest level must be the same field you have defined in the Unique Key For Table.